More about Halftones
A few months ago, I did a 3 part series about the different types of halftone processes. That prompted this newsletter about why you need halftones and what causes the output process to create them in the first place.
There are several reasons why halftones are created.
1) Variations in colors.
2) The need to make the design look like it has more colors than being printed.
3) Lighter or darker shade of a particular color.
4) In the case of a grayscale image, varying shades of white, gray and black.
5) In the case of a one color, varying shades of the color creating highlights, mid-tones and shadowing.
6) It’s a special effect.
7) Blending one color into another, often making a third color between them. This is usually called a gradient. It can also be one color fading out into nothing.
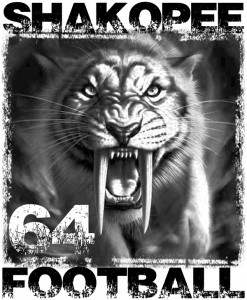
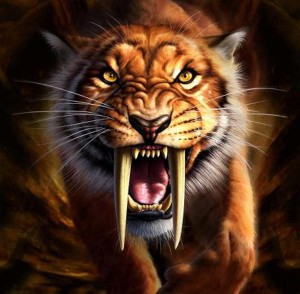
Halftones are the best way to create dynamic or realistic images. T-shirts designs created with halftone effects of highlight and shadowing tend to pop off the shirt and be more interesting than designs that are solid flat colors. Objects are created with blending of colors to create the almost 3D effect of the image. Whereas the other method of straight solid colors, especially in outline with fill designs are flatter and more stagnate images. Each have there place. However, it can be just as easy to print the halftone design that makes your image pop as to print the outline and fill design.
Here is an example of a really cool sabertooth in color and it again as a really cool one color.

You feel a whole lot more like running away from this sabertooth tiger, than one that is just black outlines and color fills.
The best way to output these halftones is with RIP software that creates the halftones on film for you. You can create manual halftones using various tools and filters in most graphic software. It is trickier and harder to tell how it will print to film and then your garment. It is best to try different setting to find the best combination that works for how your garment is being printed.
There are also 3-party plug-ins to help with this process. I revealed those in a previous newsletter. Do your research, download the trial softwares and test which one of those might work best for you. Those usually can be used to create realistic images or tweaked to make really cool special effects like in the old comic book pages.
Go out and experiment, play, have fun, and explore.
Until next month. Enjoy the Summer wherever you live.
Cora Kromer
cora@qdigitizing.com
